


What is Django? A Quick Django Tutorial Part 1
Table of Contents
What is Django?
Written in Python, Django is the self-proclaimed web framework for perfectionists with deadlines – and I have to agree. Django provides so much power out of the box and is built on Python – which has its own repository of libraries, PyPI – that you can lean on. It’s easy to understand why Django is the top Python web framework today and is among the top six of all programming frameworks.
The Django Framework
Django is a “batteries included” framework. There’s a built-in tool to help you with anything you might want to accomplish. Need user authentication? Django has you covered. Need to validate data from user input? You got it. Need to store data in the database after cleaning it? Yep, can do. It even has built-in features that keep you from unintentionally leaving your project open to security holes – like cross-site forgery protection built into every request. Everything is there and ready for you to work with.
Despite all that power and popularity – or possibly because of it – Django has a high learning curve. Thankfully, the documentation about Django’s capabilities is excellent, and this tutorial tutorial will get you over that curve and into Django.
Django
Before we get into the tutorial, I’d like to go over some of the building blocks that make up a Django application.
Django project
Django was designed in a way that encourages modularity, and tying all the modules together is the ultimate goal of your Django project. You can think of each individual website you’d like to create as a unique Django project made up of multiple Django apps.
Django app
A Django project is comprised of Django apps. Ideally, Django apps encapsulate a single feature set: the Unix philosophy of “do one thing and do it well” strongly applies here. Django apps are loosely coupled from the rest of the project and are installed into the Django project through the Django settings file. Generally, you should be able to plug a Django app into any Django project, further encouraging code reuse.
Django Models
Django models are classes that define what tables and columns get created in the database. When you access the database through Django’s ORM (Object Relational Mapping), you get instances of your Model class and can access the data through the fields you defined on that Model. Interacting with the model instance will cause reads and writes to and from the database. Learn more about Models here.
Django Views
Views are situated between what the user sees when they hit your Django project from their browser, and the data that you have in your database. A View takes a web request and returns a web response back to the browser. The View is where the logic of “what do we want to return to this particular request?” lives. By default, Django Views return HttpRequests but they can return JSON, HTML, XML, attachments, or whatever you want them to – as long as it’s contained in a Response object.
Historically, Django Views were just functions and you were mostly on your own when writing them. Now, Django has an entire suite of Generic Class-Based Views that you can configure and use right out of the box. They cover the majority of views you’ll need in any given application, and since they’re Python classes, they’re also inheritable and extensible. Familiarize yourself with them here.
Django Templates
The Django template is a mix of HTML and Django’s own templating language which consists of tags, variables, and filters. The template is Django’s presentation layer: this is where things get pretty. The template can do everything an HTML file can do, with the addition of being able to do some light logic processing and gaining access to any data that’s passed to the template from the View. When Django evaluates the template, variable tags are replaced with actual data, and any logical template tags are processed before Django outputs the final rendered template to the request. You can read more about templates here.
Django Tutorial
For this tutorial, I will be using Django 2.1.7 and Python 3.6.7. You can access the code from this tutorial on Kite’s github repository.
Let’s set the stage for a fun Django project!
Here’s the story: you and your friends are improv enthusiasts and love Whose Line is it Anyway and the musical stylings of Wayne Brady. You want to create a Django project that you can use to play Whose Line Is It Anywayat your next improv party.
Let’s look at the scenario (or User Story) to lay out the requirements.
“As Improv party-goers, we want to get randomized scenes so we can act them out.”
Pro Tip: User Stories are part of Agile Development that let you visualize how a user will use your application and help lead product requirements. Think of stories as a conversation about what one person wants or needs from your application.
From that story, in its simplest form, we can see that we need a single View that displays a single, random, scene to the browser. One person from the group of players would open the Django project in their browser, and on every page load, the scene will change to a new random scene from a list of scenes in the system.
We’re not going to worry about Models and touching the database at this point. We’ve got a party to get to, after all!
The first thing we’re going to do is create a virtual environment for our new project. You can install Django into the global pip namespace but it’s a good idea to keep things isolated. If you’re anything like me, you’ll have dozens of projects you’re working on at once, with very different requirements. When you start doing that in the global pip namespace, you’ll quickly learn why virtual environments are a lifesaver. At the most basic level, they keep your project protected from other projects on your system, so that each one can have exactly what libraries it needs installed and none it doesn’t. This gets even more important when multiple projects need the same library, but in different versions.
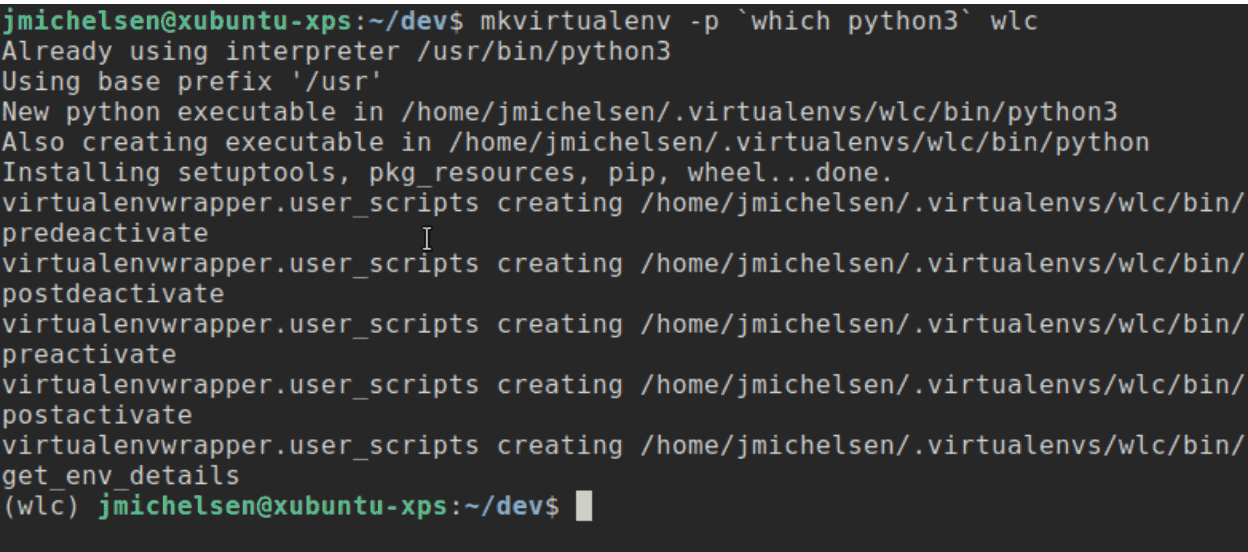
Now that we have a virtualenv for our project, let’s install Django:
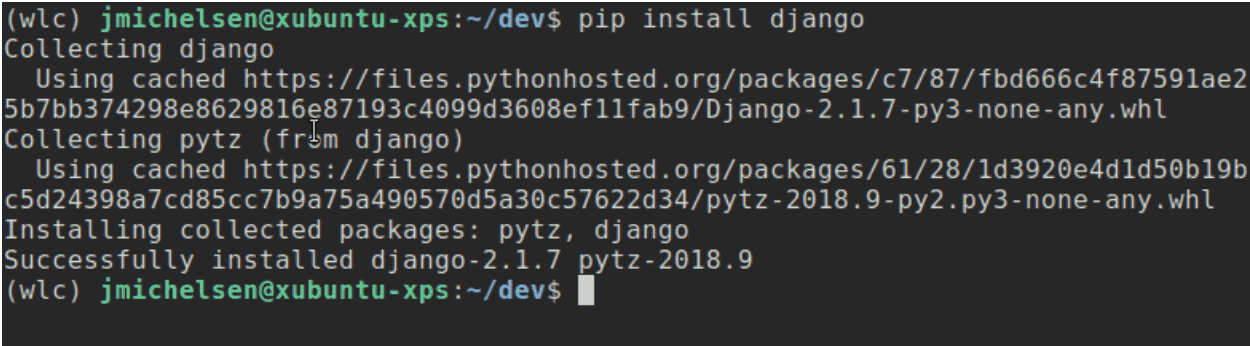
After Django is installed, you’ll be able to use the django-admin utility. This utility is used to create Django projects and apps, as well as other useful things. When you use these commands to create your projects and apps, django-admin automatically creates the boilerplate Django needs for your project to run.

Now you’ve got a Django project which contains the root level directory for the project, and within it, the Django manage.py utility and a Python package that shares the same name as your project and contains your Django settings.py file, root urls.py file, and wsgi.py file.
The fact that the project and subdirectory share the same name has always thrown me off a bit, since that subdirectory isn’t a true Django app and merely contains settings for the whole Django project.
A convention I use to sort this out is to rename this starter package to config, because that’s exactly what it is: a Python package that contains modules used to configure the Django project.
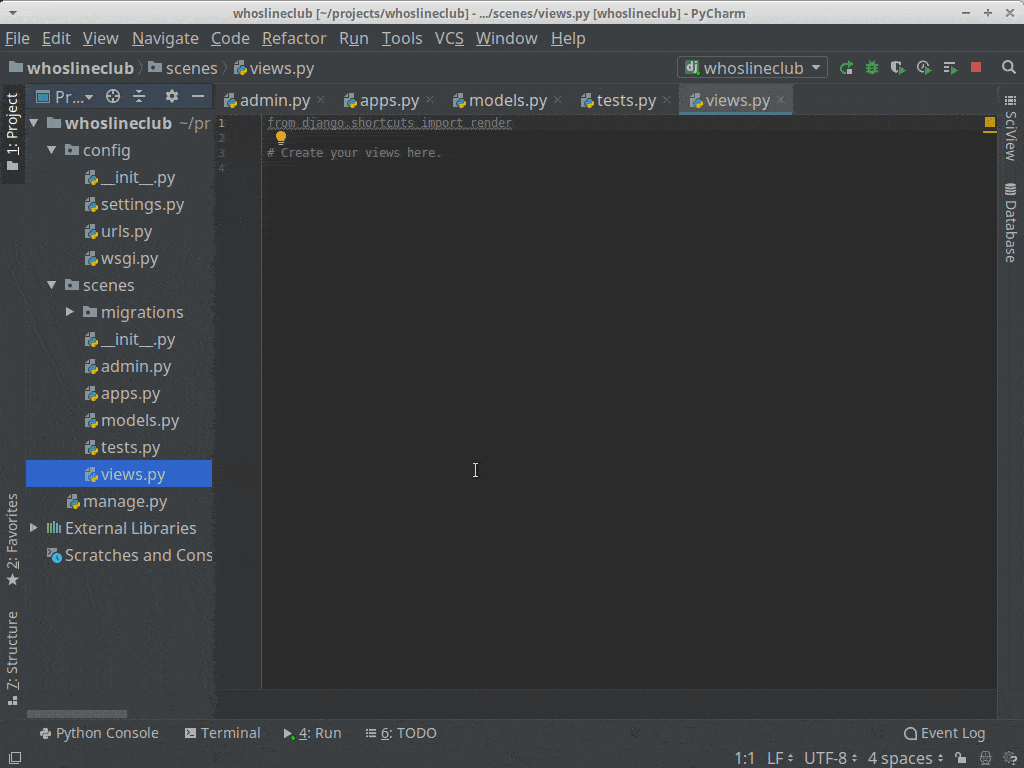
Next, let’s create a Django app within our project. Using the django-admin startapp command automatically creates the file structure and adds the boilerplate modules for a Django app. The important ones for us today are models.py, and views.py. We’ll use the others later on, and add a few of our own to make this project purr.
When naming your apps, follow the philosophy that describes an app as a Python package which provides a single set of features and can be reusable in other projects. A good convention to follow for an app name is to make the name a plural version of the main model of the app. So in our case, the main model will be “Scene”. So we’ll call the app “scenes”.
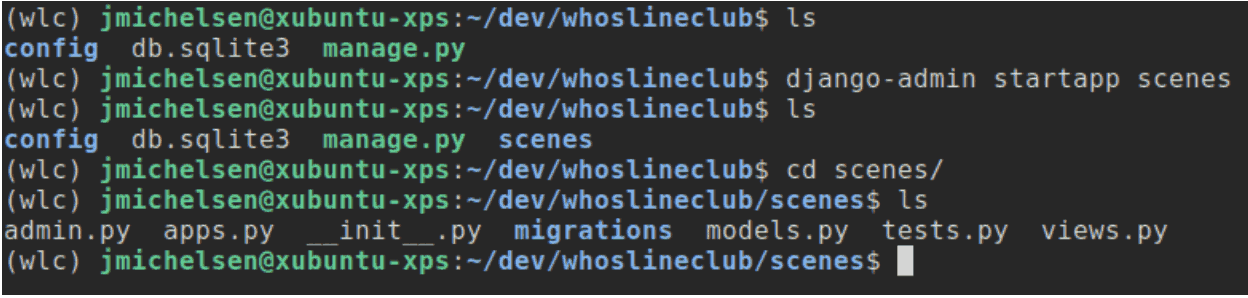
Now that our app is created, we’ve got some empty modules for where the code should be.
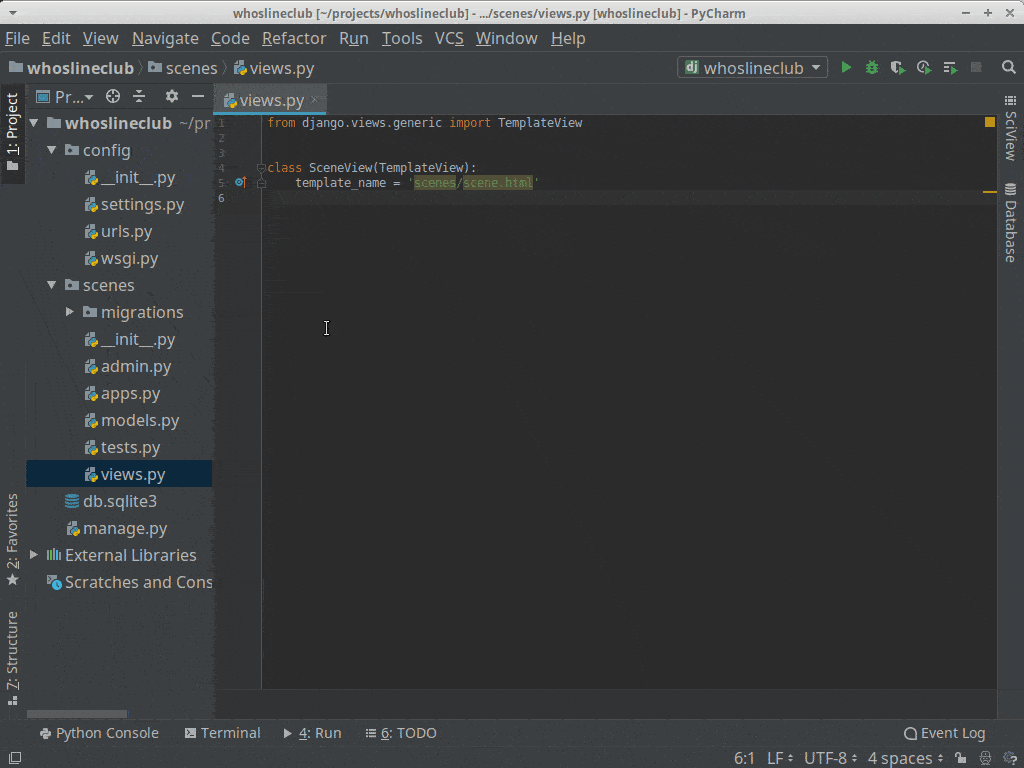
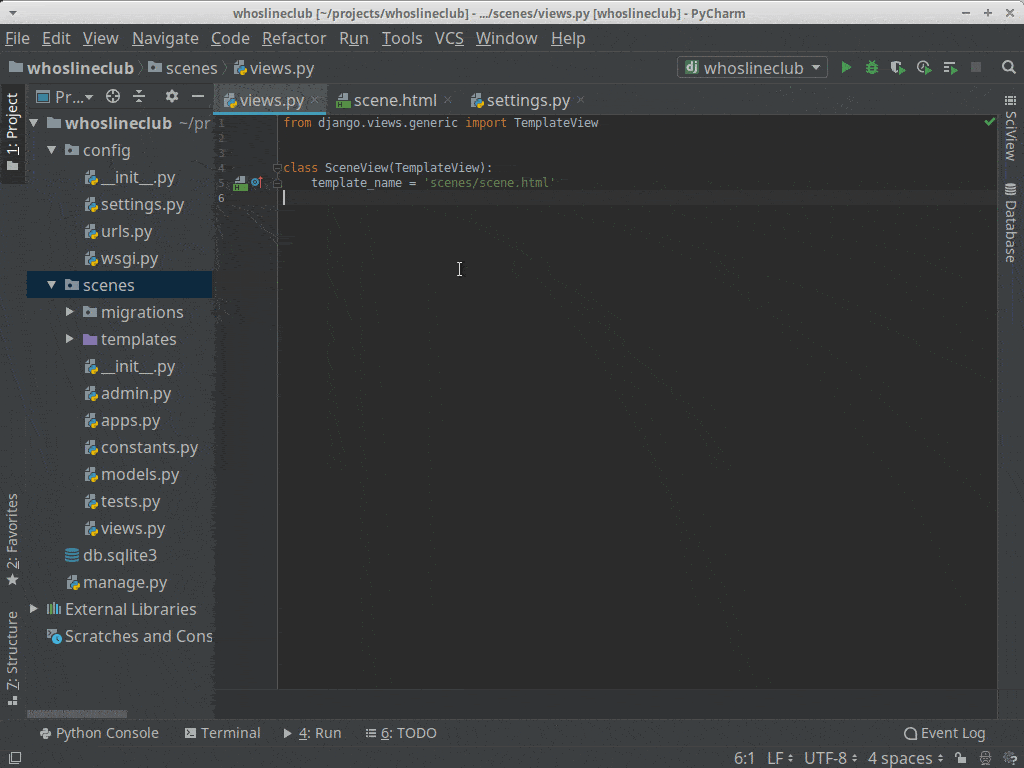
For our View, we’re going to use one of Django’s Generic Class-Based View, and you will see some of the power and simplicity that comes from using Django for your project. These Views are part of Django’s core and are designed to cover the most common problems being solved in a web application. We’re going to use one of the most basic views, the TemplateView, that just serves a template as a rendered HttpResponse, because we just want to serve some static data to a page.
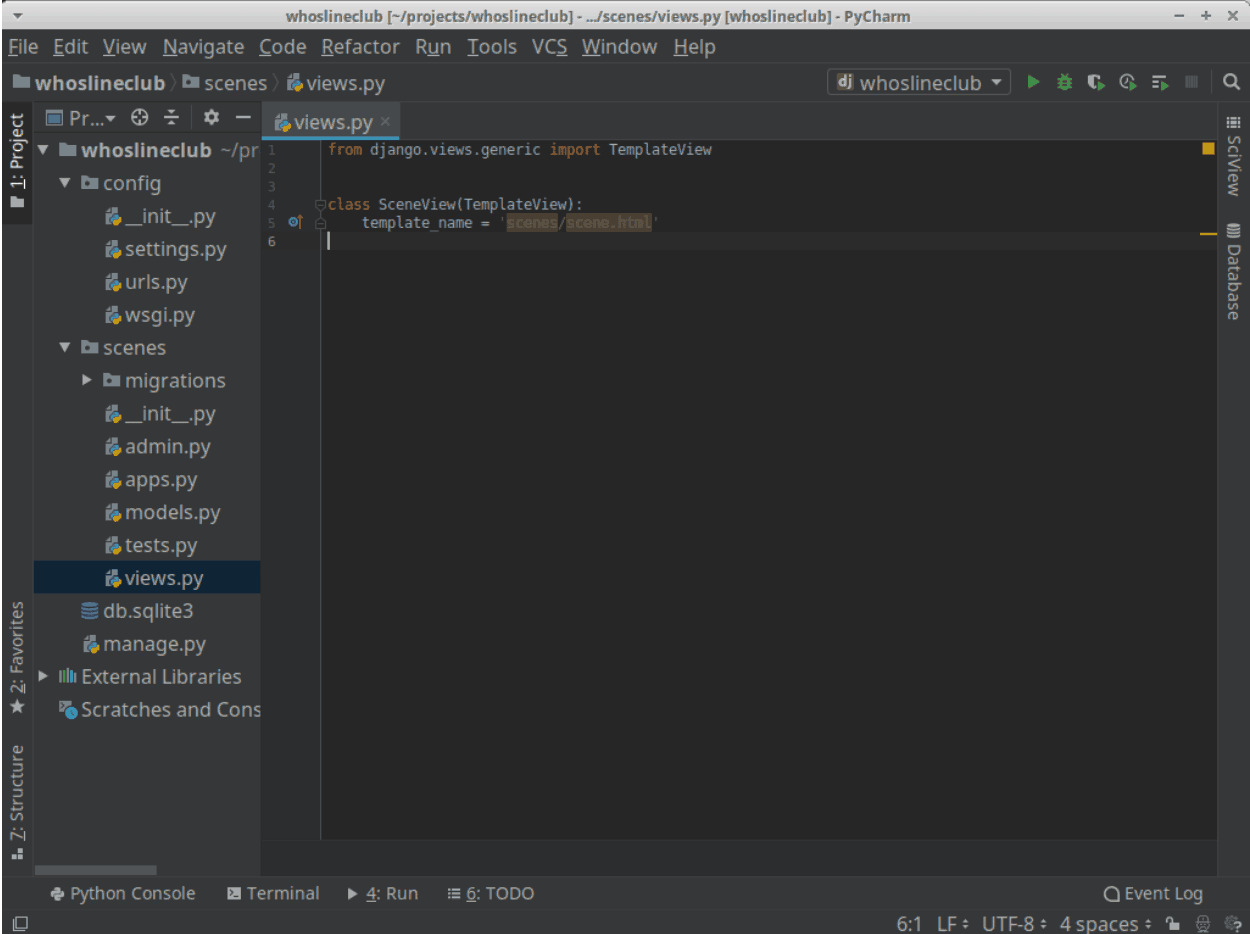
You may have noticed that we don’t actually have any templates at the moment. So, let’s create a directory to store templates and then our first template file. Note that each app will have its own templates directory which Django automatically indexes the contents as available templates, and to give us more information in our views, we’re going to namespace our templates with our app name.
The last step in making sure Django can see our templates, as well as our app in general, is adding the app to INSTALLED_APPS in the Django settings file.
I’m using PyCharm and with Django support enabled, so PyCharm will be able to see what template files are indexed, and indicate when they are missing or are in the wrong place when referenced in a view. This is a handy feature when you’re trying to debug why your view is throwing errors. (Don’t worry, this happens.)
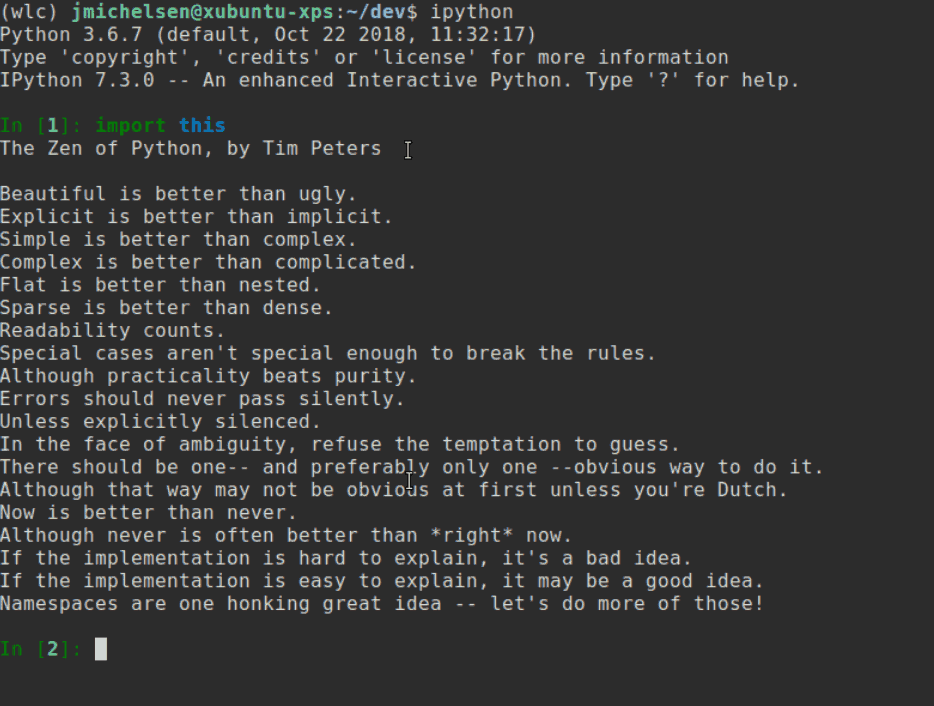
Since I mentioned namespaces previously, I’ll go ahead and explain them in a bit more detail. From The Zen of Python, “Namespaces are one honking great idea – let’s do more of those!”.
I agree with that statement because namespaces help remove ambiguity from code, so I added `scenes` to our template name because that tells me which app that template is coming from. In Django, you can have lots of apps, and those apps can have lots of templates; even with just a few apps, there’s bound to be overlap in what you want to name your templates. Namespacing the templates dir helps you – and Django – know which template you actually want when you assign a template with an ambiguous name to a View.
Let’s go back to our app.
At this point, we have a View that serves a template. However, our View isn’t adding anything to the template, and the template is empty.
Let’s get something for the template to display, and then we’ll modify our template to actually display the said something. We’re just going to put some static scenes into a constants file, which we’ll then use in our View. A constants file is just what it sounds like: a file containing static data that doesn’t change.
Pro Tip: PEP8 says constants should be written in all capital letters, with underscores separating words. [https://www.python.org/dev/peps/pep-0008/#constants]
Looking inside the TemplateView, we can see that it returns a context object to the rendered template. In our SceneView which inherits from TemplateView, we can add get_context_data and in it, and super to the parent class to get its context. Then we add our own data to that context dictionary which is passed into the render_to_response, and finally ends up in the template being returned as a TemplateResponse.
Now our template is getting the data, but it’s completely blank. Even though the View is passing context to the template, an empty template will render exactly that to the browser. Let’s just spit out the entire constant that we added to the context and make sure it is accessible in the template.
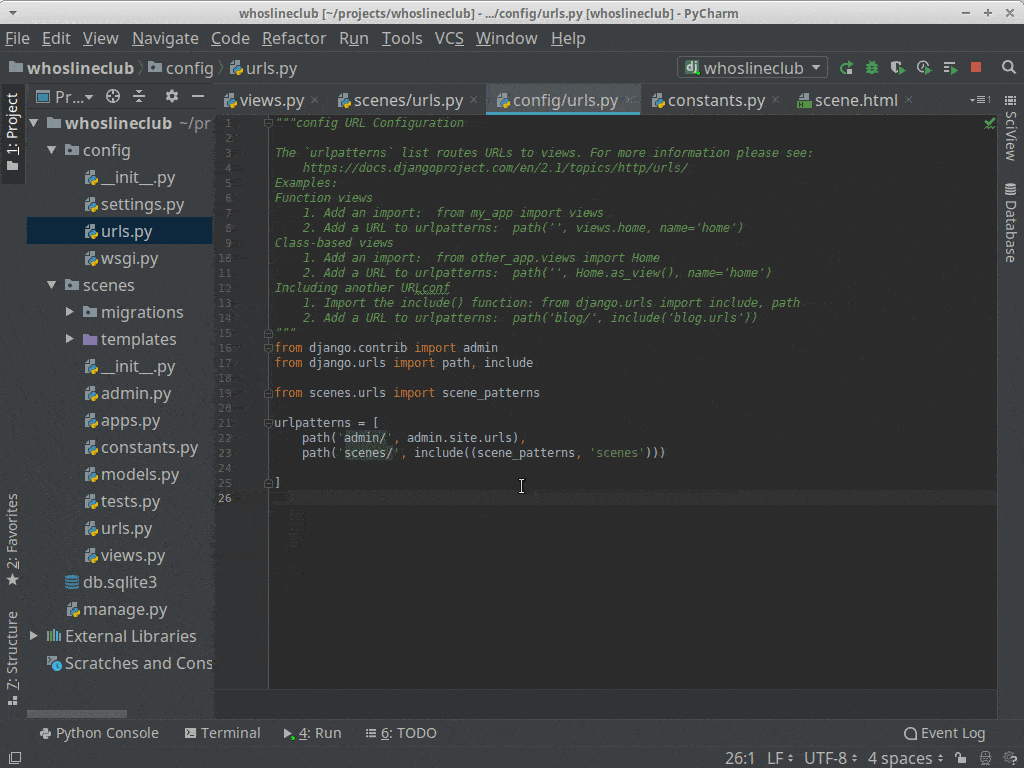
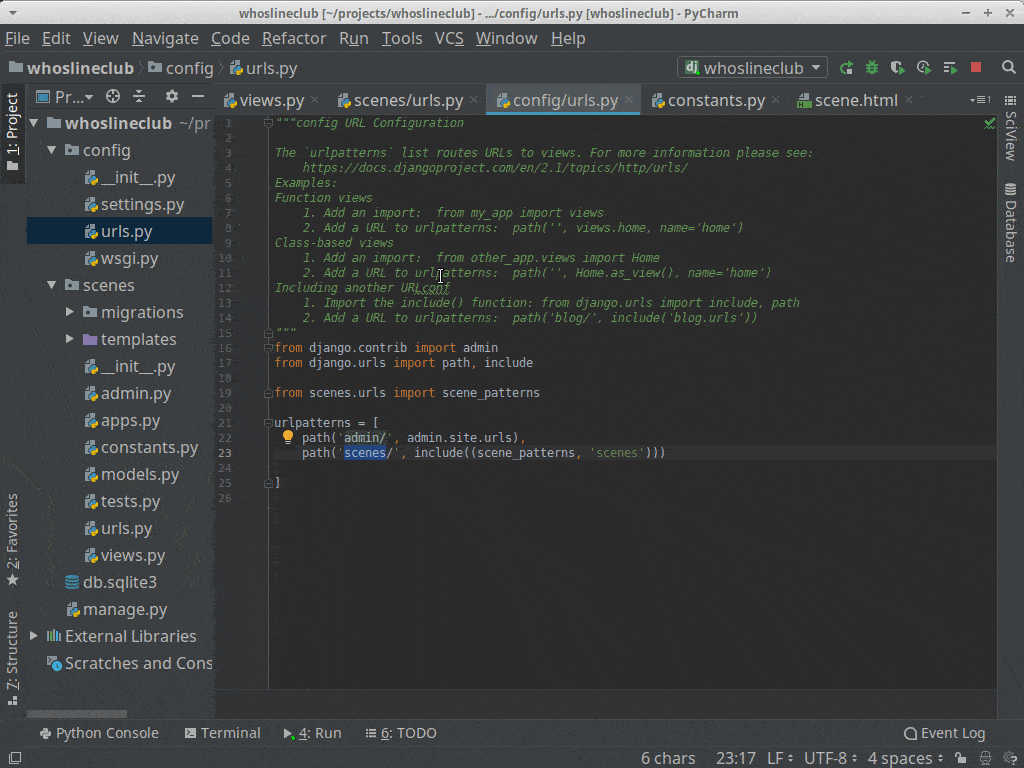
Before we can access our view from the browser, we also need to add it to the urls.py so that Django knows how to route requests to our view.
That’s not exactly what we’re looking for, but at least the data is getting through to the template. Our goal is for the page to give us a random scene from our scenes to Improv with our friends. Django has a built-in template filter we can use here called, you guessed it, `random`.
And just like that, our template is now randomly selecting one of our scenes and returning it when the page is loaded.
Success! You’ve just built your first Django project! It’s ugly, but it works.
You can see from this part of the tutorial that with very little custom code, we’ve already got a fully functional Django project. We could deploy this and call it done. With Django’s built-in Generic Class-based Views, and template tags and filters, we can do a lot with very little.
With just the little bit of Django we’ve covered so far, you could create a landing page for launching a new business, create an information site for your local community center, or create a sales page for that great new product you’ve been developing. We haven’t covered any dynamic functionality in Django, so any kind of website you can think of where the content doesn’t change very often could be built using the approach we’ve taken here.
In the next part of the tutorial, we’ll get into adding some of the Django functionality that can be used to drive dynamic websites.
This post is a part of Kite’s new series on Python. You can check out the code from this and other posts on our GitHub repository.
Resources
 in San Francisco